
Enjoy your Lightswing® right away

So you have time to think about it

We'll prepare your order the same day
Enjoy your Lightswing® right away
So you have time to think about it
We'll prepare your order the same day

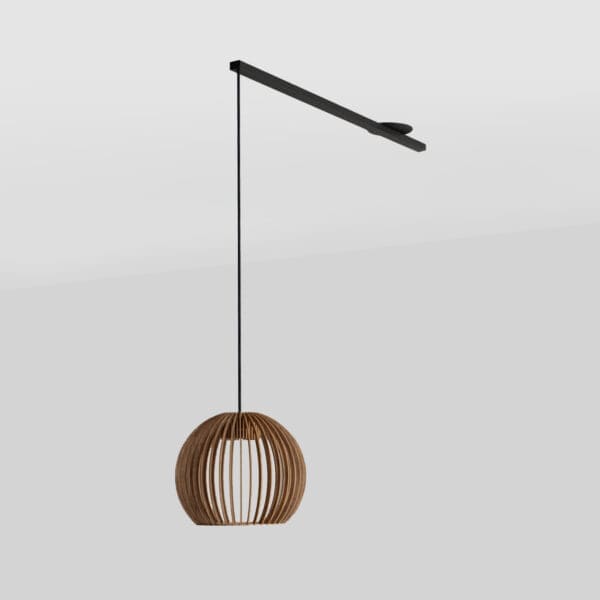
Mount the Lightswing® and turn and slide your pendant light to the desired place. Making sure your light is always centered.
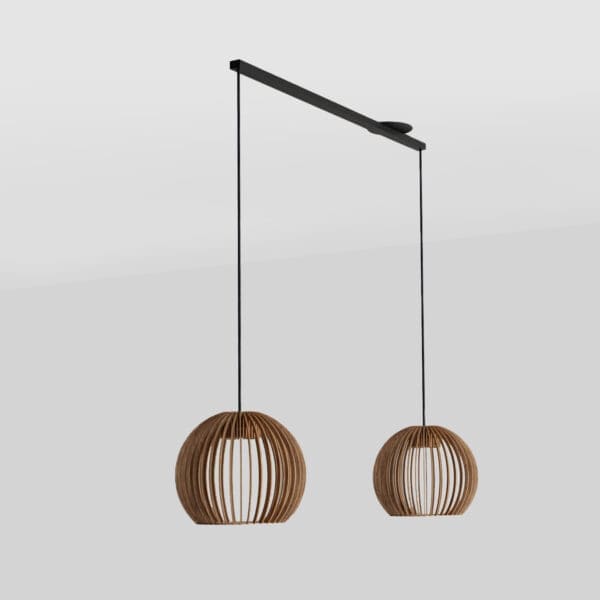
Both your pendant lights can turn and slide, ensuring they are always perfectly centered and simple to adjust.
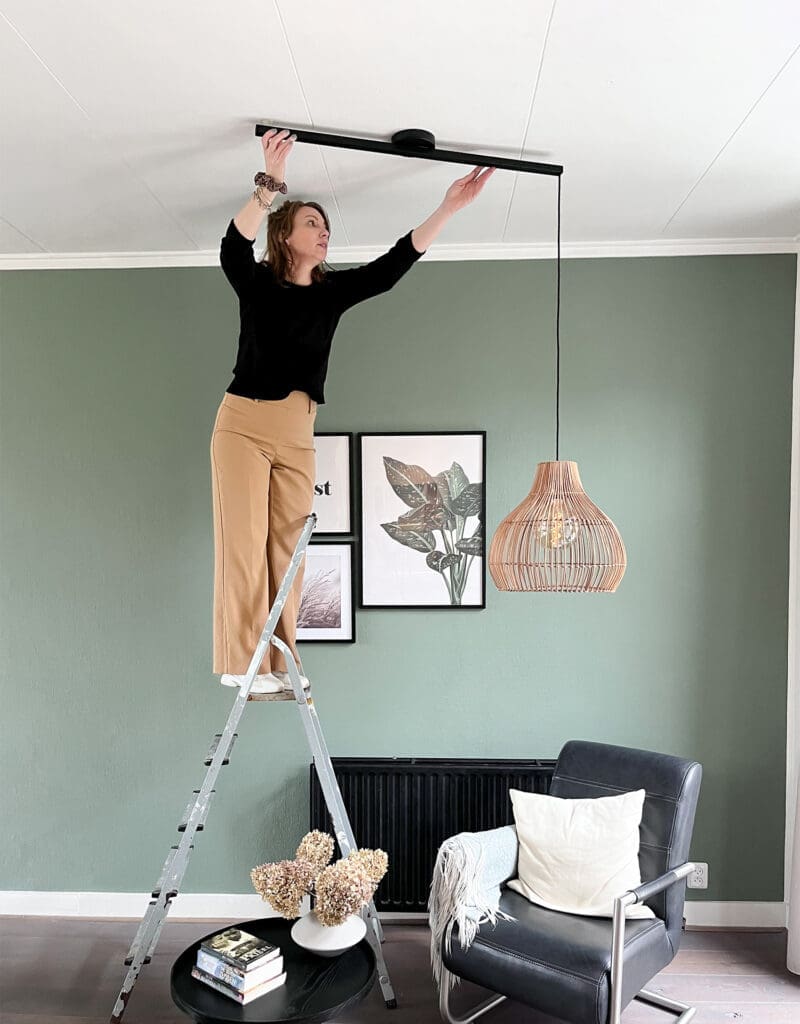
Of course, firstly, you turn off the power to the connecting wires. You install the Lightswing® onto the junction box on your ceiling, or use our mounting ring if you have a specific ornament or location in mind. The Lightswing® can also be connected directly to an electricity cable coming from your ceiling.
After determining the Lightswings location, drill four holes in the ceiling using the provided drilling template. Then, connect the electricity cable from the Lightswing® to the supplied terminal block. Check to ensure that the Lightswing® can rotate and slide freely. Next, secure the Lightswing® to the ceiling using the four drilled holes.
The final step is to attach the pendant light(s) to the Quick Release. To do this, strip a part of the cord and attach it to the terminal block of the Quick Release. Click the Quick Release in the Lightswing® to connect the pendant light and adjust it into place. Finally, switch the power back on and enjoy the flexibility of your pendant light(s).
Enjoy your Lightswing® right away
So you have time to think about it
We'll prepare your order the same day

The Lightswing® is attached to the ceiling, often over the existing light fixture. Once the system is in place, you can turn and slide the Lightswing® to the spot where you want the pendant to hang.
Do you want to change the position of your table and your pendant light? No problem! The Lightswing® has a sliding range of up to 93 cm and 360° rotation. Want to switch pendant lights? Thanks to the Quick Release , that's no problem.
Your Lightswing® is suitable for one or two pendant lights. The 90cm version can carry up to 2.5 kg per pendant. The Lightswing® Single is designed for one pendant, and the Lightswing® Twin is suitable for two pendants.
Celebrate Easter with Lightswing! 🐰 This weekend, Lightswing brings cozy lighting to your decorated dining table. Discover our innovative lighting solution and give your home a warm glow.✨🐣
Show us your amazing easter set up and tag us! #Easter #Lightswing #Innovation #Lighting

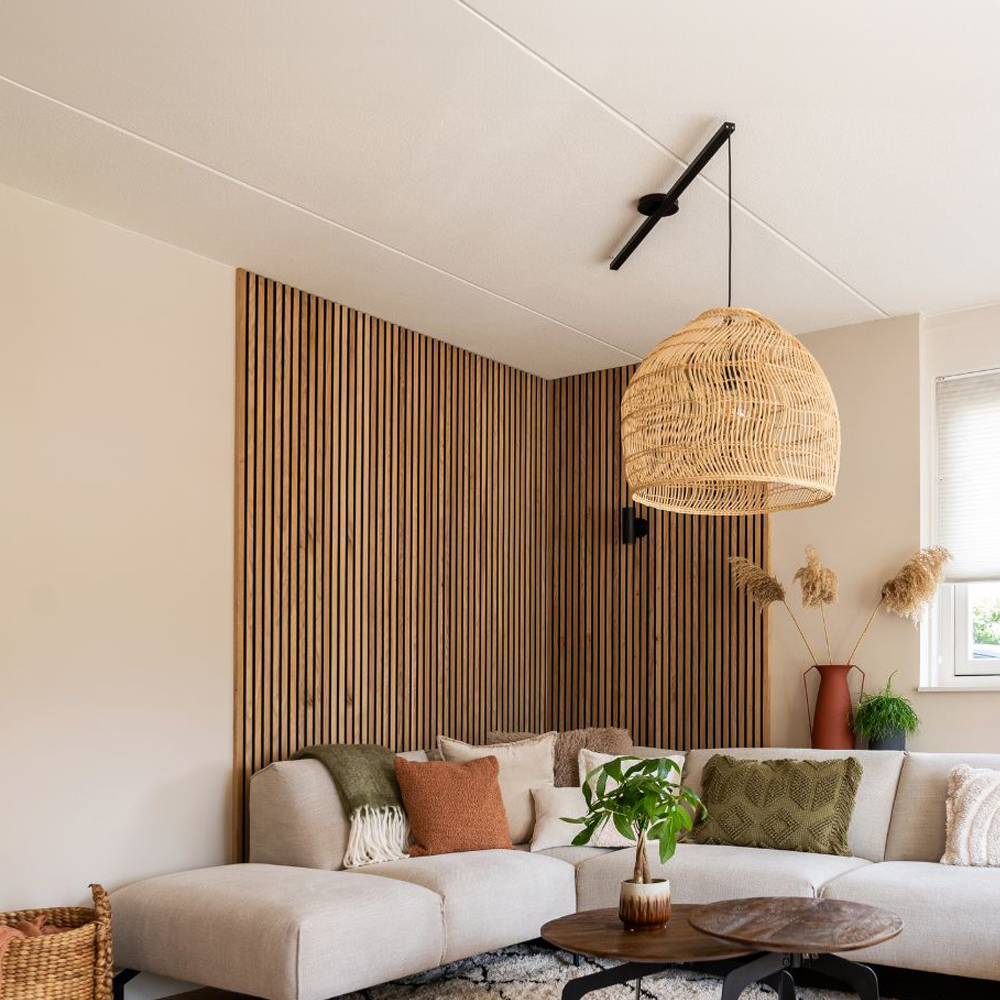
Discover how Lightswing elevates any bohemian interior effortlessly ✨🌿
#lightswing #lightswingathome #livingroom #diningroom #interiør #interiør #interior_and_living #easychangehomedecor #pedantlights #interior #interiorinspiration #interioraddict #interiorinspo #lovemyinterior
Easily turn around your pendant light with the Lightswing!
The lightswing can rotate up to 360º 🤩💡
#lightswing #lightswingathome
With the lightswing you can easily move your pendant lights! 😉✨
Lightswing twin 110 cm: 90 cm left and right
Lightswing twin 90 cm: 75 cm left and right
Lightswing single 110 cm: 93 cm left and right
Lightswing single 90 cm: 80 cm left and right
#lightswing #lightswingathome
Easily switch up your pendant lights whenever you feel like it with the Lightswing! 💡✨
#lightswing #lightswingathome
💡 Tired of struggling with the ancient art of hanging a lamp? Say goodbye to those #lightingdilemmas with our Lightswing! No more DIY disasters, just easy breezy illuminating vibes 🌟 Who`s ready to light up their life the easy way? Let us know in the comments! 🔌
#lightswing #lightswingathome #livingroom #diningroom #interiør #interiør #interior_and_living #easychangehomedecor #pedantlights #interior #interiorinspiration #interioraddict #interiorinspo #lovemyinterior
All the possibilities with the Lightswing® are endless ✨ Why do you love the Lightswing®? 🤩💡
#lightswing #lightswingathome #Pendantlight #uk #netherlands #explorepage #interior
Happy wednesday! Only a few more days left till it`s the weekend! how excited are you? 🌟🤩
#lightswing #lightswingathome #livingroom #diningroom #interiør #interiør #interior_and_living #easychangehomedecor #pedantlights #interior #interiorinspiration #interioraddict #interiorinspo #lovemyinterior


